Building your website locally
Create a folder on your computer where you will store all contents related to your sql website.
In the rest of this tutorial, we will call this folder the root folder of your website.
- On Windows, place the
sqlpage.exe you downloaded above at the root of the folder. Then double-click the sqlpage.exe file to start the server.
- On Linux, place
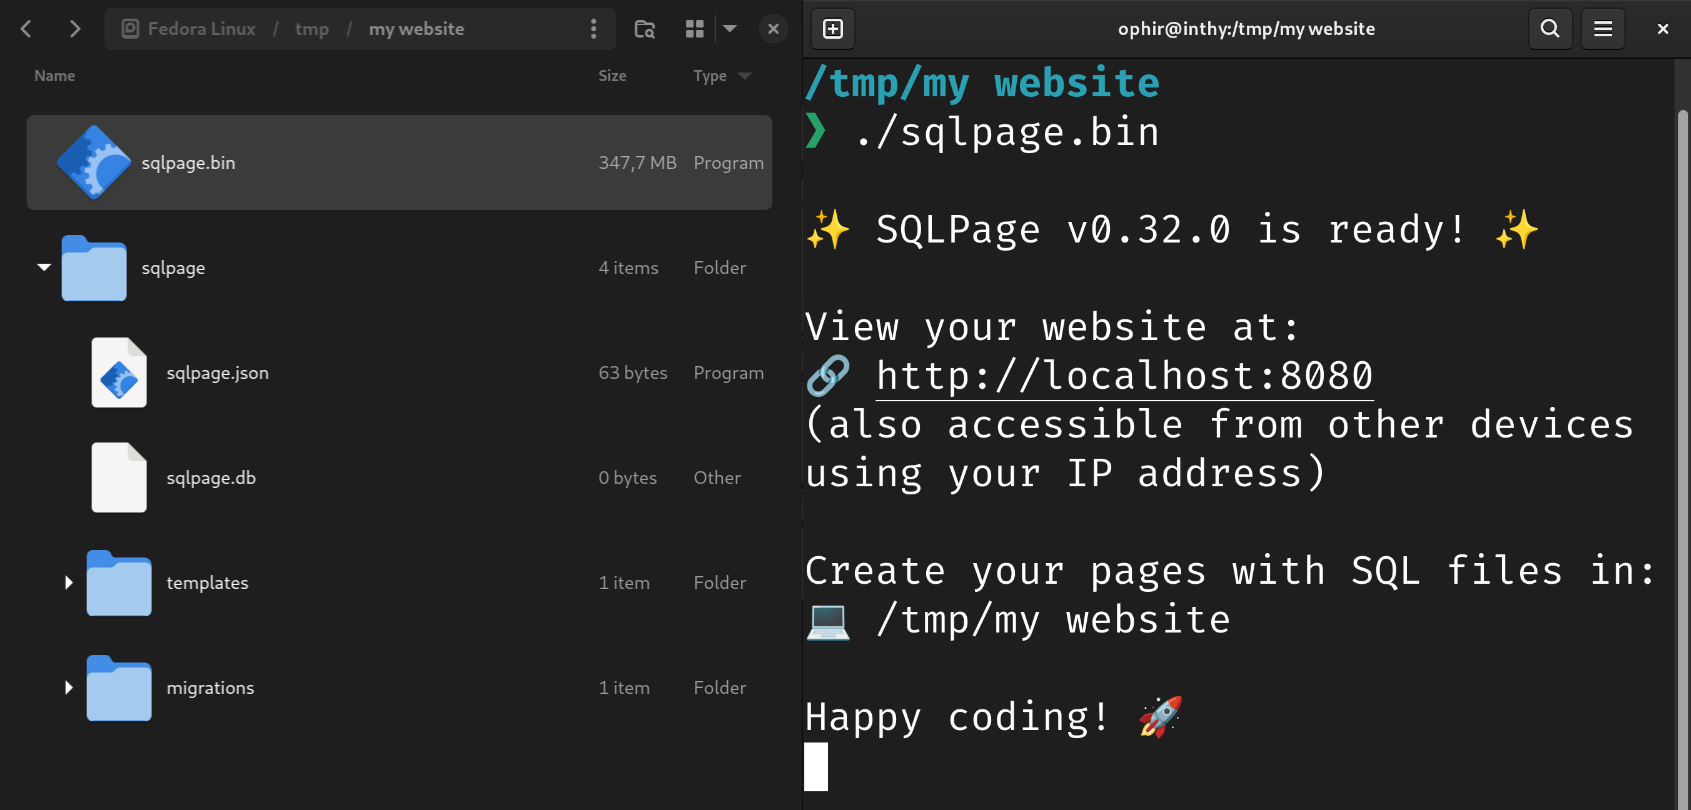
sqlpage.bin at the root of the folder. Then open a terminal, cd to the root folder of your website, and run ./sqlpage.bin to start the server.
- On Mac OS, if you installed SQLPage using Homebrew, then you do not need to place anything at the root of the folder. Open Terminal, cd to the root folder of your website, and type
sqlpage to start the server.

You should see a message in your terminal telling you that SQLPage is ready, and giving you the address of your website.
You can open your website locally by visiting http://localhost:8080
SQLPage should have automatically created a folder called sqlpage with a SQLite database file named sqlpage.db. This is your website's default database - don't worry, we'll learn how to connect to other databases like PostgreSQL, MySQL, or SQL Server later!
Your website's first SQL file
In the root folder of your SQLPage website, create a new SQL file called index.sql.
Open it in a text editor that supports SQL syntax highlighting (I recommend VSCode).
The index.sql file will be executed every time a visitor opens your website's home page, and the results will be displayed to the visitor
using the components you specify in the file.
Let's start with a simple index.sql that displays a list of popular websites:
SELECT 'list' AS component,
       'Popular websites' AS title;

SELECT 'Hello' AS title,
       'world' AS description,
       'https://wikipedia.org' AS link;

The first line of the file defines the component that will be used to display the data, and properties of that component.
In this case, we use the list component to display a list of items.
The second line defines the data that will populate the component.
All the components you can use and their properties are documented in SQLPage's online documentation.
Your database schema
If you already have a database populated with data,
or if you intend to use other tools to manage your database structure,
you can skip this section.
The database schema for your SQLPage website
can be defined using SQL scripts located in the
sqlpage/migrations subdirectory of your website's root folder.
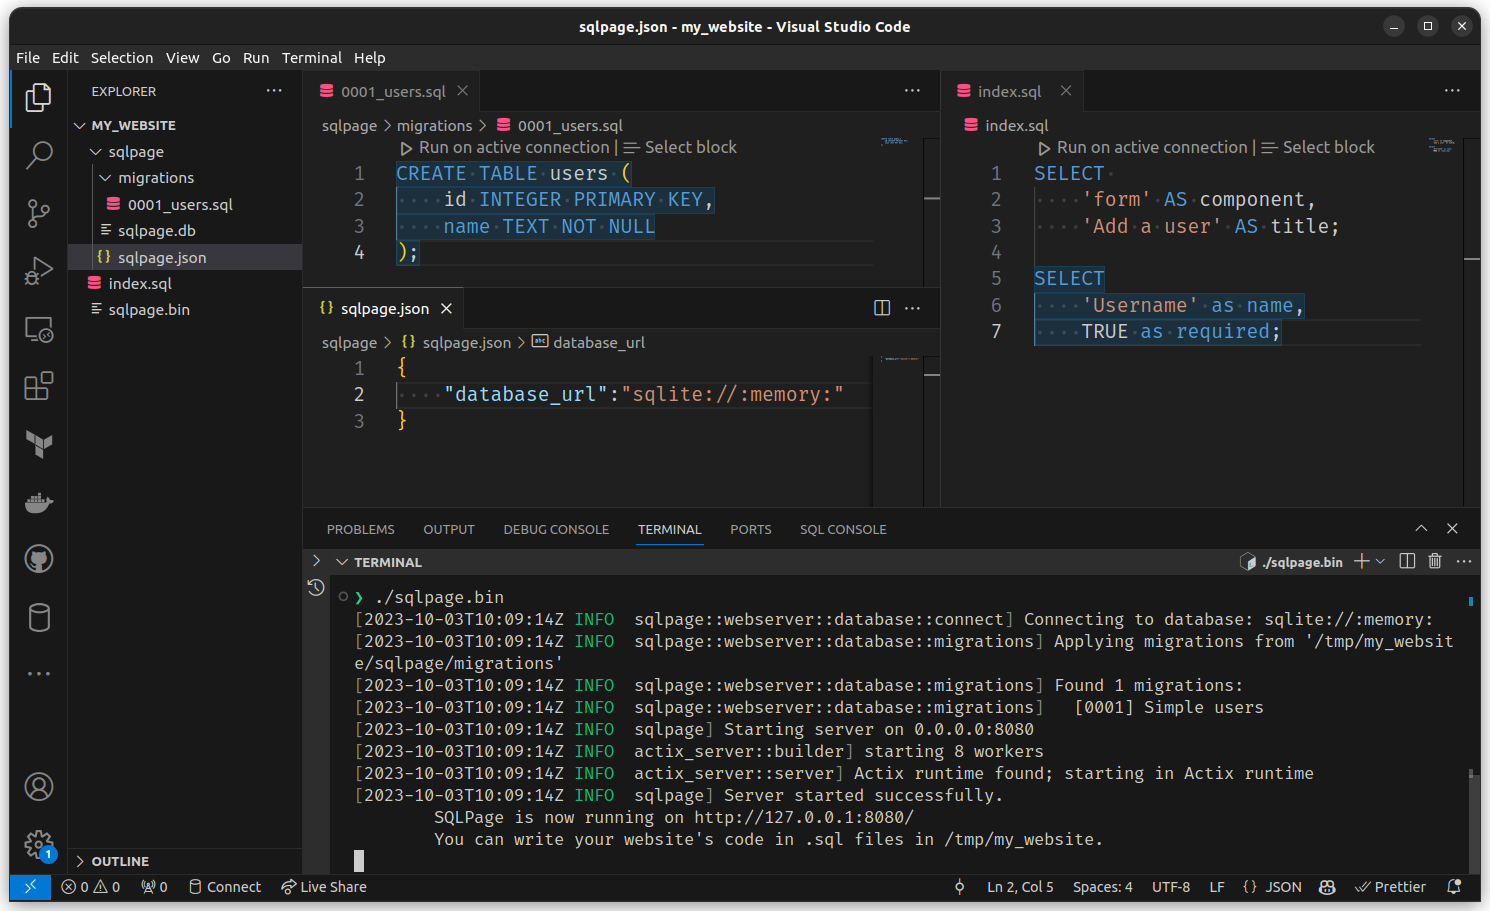
For our first website, let's create a file located in sqlpage/migrations/0001_create_users_table.sql with the following contents:
CREATE TABLE users (
    id INTEGER PRIMARY KEY,
    name TEXT NOT NULL
);
If you need to quickly test a database schema and associated queries online,
before making any change to your database, I can recommend sqliteonline.com (which actually also works with Postgres, MySQL, and SQL Server).
Please read our introduction to database migrations to
learn how to maintain your database schema in the long term.
Note: The migration system is not supported on Microsoft SQL Server databases.
If you are using a SQL Server database, you should create your tables using a different tool, such as SQL Server Management Studio.
Connect to a custom database
By default, SQLPage uses a SQLite database stored in a file named sqlpage.db
in the sqlpage configuration folder.
You can change this by creating a file named sqlpage.json in a folder called sqlpage.
So, if your website's root folder is /my_website, you should create a file at /my_website/sqlpage/sqlpage.json.
Here is an example sqlpage.json file:
{ "database_url": "sqlite://:memory:" }
This will tell SQLPage to use an in-memory SQLite database instead of the default file-based database. While this means all changes to the database will be lost when you stop the SQLPage server, it's useful for quickly testing and iterating on your database schema.
If you then deploy your website online using a service like DataPage.app, it will automatically use a persisted database instead.
Later, when you want to deploy your website online, you can switch back to a persistent database like
- a SQLite file with
sqlite://your-database-file.db (see options),
- a PostgreSQL-compatible server with
postgres://user:password@host/database (see options),
- a MySQL-compatible server with
mysql://user:password@host/database (see options),
- a Microsoft SQL Server with
mssql://user:password@host/database (see options, note about named instances),
- any ODBC-compatible database like DuckDB, ClickHouse, Databricks, Snowflake, BigQuery, Oracle, Db2, and many more. See ODBC database connection instructions.
If user or password contains special characters, you should percent-encode them.
For instance, a SQL Server database named db running on localhost port 1433 with the username funny:user and the password p@ssw0rd would be represented as
mssql://funny%3Auser:p%40ssw0rd@localhost:1433/db.
For more information about the properties that can be set in sqlpage.json, see SQLPage's configuration documentation

Use parameterized SQL queries to let users interact with your database
Displaying a form
Let's create a form to let our users insert data into our database. Add the following code to your index.sql file:
SELECT 'form' AS component, 'Add a user' AS title;
SELECT 'Username' as name, TRUE as required;
The first SELECT statement opens the form component.
The second SELECT statement adds a field to the form. Since we do not specify a type, it will be a text field. The label displayed above the field will be the same as its name by default.
Handling form submission
Nothing happens when you submit the form at the moment. Let's fix that.
Add the following below the previous code:
INSERT INTO users (name)
SELECT :Username
WHERE :Username IS NOT NULL;
The snippet above uses an INSERT INTO SELECT SQL statement to
safely insert a new row into the users table when the form is submitted.
It uses a WHERE clause to make sure that the INSERT statement is only executed when the :Username parameter is present.
The :Username parameter is set to NULL when you initially load the page, and then SQLPage automatically sets it to the value
from the text field when the user submits the form.
Parameters
There are two types of parameters you can use in your SQL queries:
- URL parameters like
$ParameterName. If you add ?x=1&y=2 to the end of the URL of your page, $x will be set to the string '1' and $y will be set to the string '2'. This is useful to create links with parameters. For instance, if you have a database of products, you can create a link to a product page with the URL product?product_id=12 (or product.sql?product_id=12 - both work). Then, in the product.sql file, you can use the $product_id variable to get the product with the corresponding ID from your database. URL parameters are also sometimes called query parameters, or GET parameters.
- Form parameters like
:ParameterName. They refer to the value of the field with the corresponding name entered by the user in a form. If no form was submitted, it is set to NULL. Form parameters are also sometimes called POST parameters.
Note: Currently, if a $parameter is not present in the URL, it is first looked for in the form parameters. If it is not found there either, it is set to NULL. Please do not rely on this behavior, as it may change in the future.
You can also set parameters yourself at any point in your SQL files in order to reuse
their value in several places, using the SET ParameterName = value syntax.
For instance, we could use the following code to save the username in uppercase:
SET Username = UPPER(:Username);
INSERT INTO users (name) VALUES ($Username);
Displaying data from our database
Now, users are present in our database, but we can't see them.
Let's see how to use data from our database to populate a list component, in order to display the list of users.
Add the following code to your index.sql file:
SELECT 'list' AS component, 'Users' AS title;
SELECT name AS title,  CONCAT(name, ' is a user on this website.') as description FROM users;
Your first SQLPage website is ready!
You can view the full source code for this example on Github
Here is a screenshot of the final result:

To go further, have a look at the examples.
Deploy your SQLPage website online
Using DataPage.app
To deploy your SQLPage website online, the easiest way is to use DataPage.app,
a managed hosting service for SQLPage websites maintained by the same people who develop SQLPage.
Just create an account, and follow the instructions to upload your website to our servers. It will be live in seconds!
Manually
If you prefer to host your website yourself, you can use a cloud provider or a VPS provider. You will need to:
- Configure domain name resolution to point to your server
- Open the port you are using (8080 by default) in your server's firewall
- Setup docker or another process manager such as systemd to start SQLPage automatically when your server boots and to keep it running
- Optionally, setup a reverse proxy to avoid exposing SQLPage directly to the internet
- Optionally, setup a TLS certificate to enable HTTPS
- Configure connection to a cloud database or a database running on your server in
sqlpage.json
Go further
- Check out learnsqlpage.com by Nick Antonaccio for an in-depth tutorial with many examples
- Read the SQLPage documentation to learn about all the components available in SQLPage
- Read about SQLPage's extensions to SQL for a specification of the SQL syntax you can use in SQLPage, the data types used when exchanging data with the browser and with the database, a clear explanation of how SQLPage variables and SQLPage functions work.
- Join the SQLPage community to ask questions and share your projects
- If you like videos better, check this series that shows how to build and deploy your app from scratch SQLPage on Youtube


